Openstack AMI(Amazon Machine Image) 格式镜像制作教程CentOS版

追忆
以前在Yottaa时候答应过灿哥,大伟哥,向军N多次分享openstack, 结果还没开始北京这边就尼玛黄了。这次向军又问起来制作AMI的问题,我决定把以前opensatck的经验写到博客里,也算是跟大家有个迟来的交待吧
什么是AMI?
From Wikipedia
Like all virtual appliances, the main component of an AMI is a read-only filesystem image that includes an operating system (e.g., Linux, Unix, or Windows) and any additional software required to deliver a service or a portion of it.[2]
The AMI filesystem is compressed, encrypted, signed, split into a series of 10 MB chunks and uploaded into Amazon S3 for storage. An XML manifest file stores information about the AMI, including name, version, architecture, default kernel id, decryption key and digests for all of the filesystem chunks.
An AMI does not include a kernel image, only a pointer to the default kernel id, which can be chosen from an approved list of safe kernels maintained by Amazon and its partners (e.g., Red Hat, Canonical, Microsoft). Users may choose kernels other than the default when booting an AMI.
不翻译了,相信能看到这篇文章的人大多已经了解了什么是AMI镜像,废话不多说,开整
(本篇是以centos为例,ubuntu的步骤也是一样的)
步骤
预处理
1.安装一个base的系统,后面会根据将这个系统制作为镜像,我这里使用的是KVM起了一台CENTOS6.5 ,具体过程不在这里详细讲了。
这里说明一下,image文件的大小2G足以(1G也够了,你可以自己试试)。相信又不少人会问,那我以后启动虚机之后root device不会也是2G吧?这点不用担心,在虚机启动之后 cloud-init会自动扩展root device大小
qemu-img create -f raw CentOS65-GoldenImage.img 2G

virt-install --name CentOS65-GoldenImage --ram 1024 --vcpus=2 --disk path=/root/images-workspace/CentOS65-GoldenImage.img,size=2 --network bridge=br0 --os-variant=rhel6 --cdrom /root/CentOS-6.5-x86_64-minimal.iso --vnclisten=0.0.0.0 --vncport=6901 --vnc —noautoconsole
2.安装epel源,安装你需要的包
rpm -ivh http://mirror.sfo12.us.leaseweb.net/epel/6/i386/epel-release-6-8.noarch.rpm

#如果你要使用Openstack的 heat-template 或者AWS的cloud-formation 必须安装heat-cfntools。
yum install screen mtr bind-utils iftop vmstate nload python-pip heat-cfntools cloud-init vim wget man sysstat -y
3.修改网络设置
修改 /etc/sysconfig/network,修改如下值
NOZEROCONF=yes
改了之后你起的虚机才能得到正确的floating IP和网关
4.修改cloud-init配置,不然做出来的镜像无法使用root帐号登录
#vim /etc/cloud/cloud.cfg
disable_root: 0
ssh_pwauth:   1
其实cloud-init还能做很多事情,他很像一个配置管理工具,不过我都是用ansible或者puppet这里的CM工具来做这些事情,所以cloud-init这里我只配置基本功能。
5.开启KEY 登录、关闭selinux, 关闭iptables
6.确认网卡使用dhcp
DEVICE=eth0
TYPE=Ethernet
ONBOOT=yes
BOOTPROTO=dhcp
7.关机
镜像处理
这里简单说下,我们的目标是将镜像文件中的kernel, ramdisk, rootfs 分离出单独的文件。
fdisk -c -u -l /dev/loop0
losetup -f CentOS65-GoldenImage.img

fdisk -c -u -l /dev/loop0
losetup -d /dev/loop0

$start * 512 =2048 * 512 = 1048576
losetup -f -o 1048576 CentOS65-GoldenImage.img
#www.pangxiekr.com 转载请注明出处,否则干死你
dd if=/dev/loop0 of=disk.img
losetup -d /dev/loop0
mount -o loop disk.img /mnt
vim /mnt/etc/fstab
LABEL=/  / ext4 defaults 0 0

#这里必须要删除网卡之前的配置
rm -rf /mnt/etc/udev/rules.d/70-persistent-net.rules
find   /mnt/var/log/ -type f|xargs rm -f
rm -f  /mnt/etc/ssh/ssh_host_*
rm -f /mnt/root/.bash_history

#kernel
cp /mnt/boot/vmlinuz-2.6.32-431.el6.x86_64 /root/
#ram
cp /mnt/boot/initramfs-2.6.32-431.el6.x86_64.img /root/
umount /mnt
#rootfs
e2label disk.img /
ok,到目前为止,我们已经得到了3个文件:
- vmlinuz-2.6.32-431.el6.x86_64
- initramfs-2.6.32-431.el6.x86_64.img
- disk.img
为了方便起见,改下文件名:
mv vmlinuz-2.6.32-431.el6.x86_64 centos65-kernel
mv initramfs-2.6.32-431.el6.x86_64.img centos65-initrd
mv disk.img centos65-rootfs
上传镜像到Glance
这里注意,不通版本的opensatck glance 的命令有区别:
icehouse 之前的版本(包括icehouse)
glance image-create --name centos65-initrd --is-public true --container-format ari --disk-format ari < centos65-initrd

glance image-create --name centos65-kernel --is-public true --container-format aki --disk-format aki < centos65-kernel

glance image-create --name centos65 --is-public true --container-format ami --disk-format ami \
--ramdisk-id <ramdisk-id> \
--kernel-id <kernel-id> \
< centos65-rootfs
icehouse 之后的版本
glance image-create --name centos65-initrd --container-format ari --disk-format ari < centos65-initrd

glance image-create --name centos65-kernel --container-format aki --disk-format aki < centos65-kernel

glance image-create --name centos65 --container-format ami --disk-format ami \
--property ramdisk_id= <ramdisk-id> \
--property kernel_id=<kernel-id> \
< centos65-rootfs
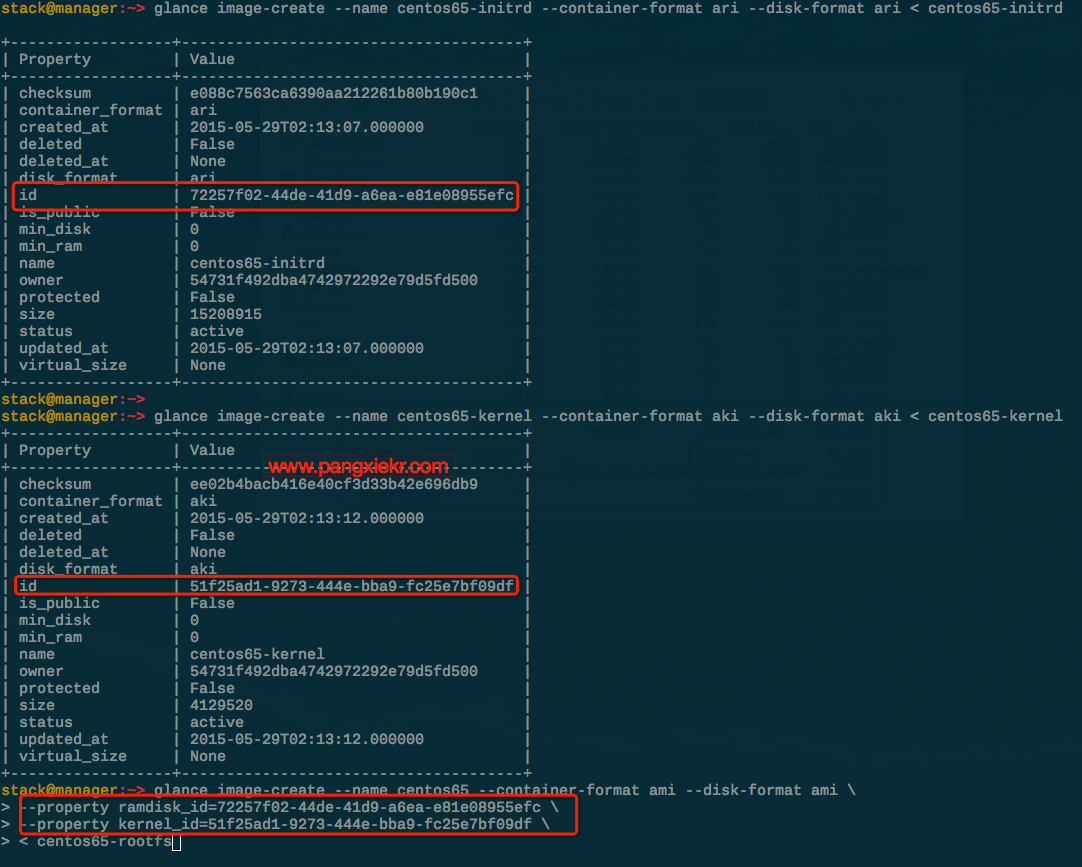
这里做个简单说明,上传分为两步,第一步先上传kernel和ramdisk 文件,最后根据上传后,glance返回的ID 作为参数上传rootfs。具体过程如下图:
上传后我们现在看下glance内所有的镜像信息
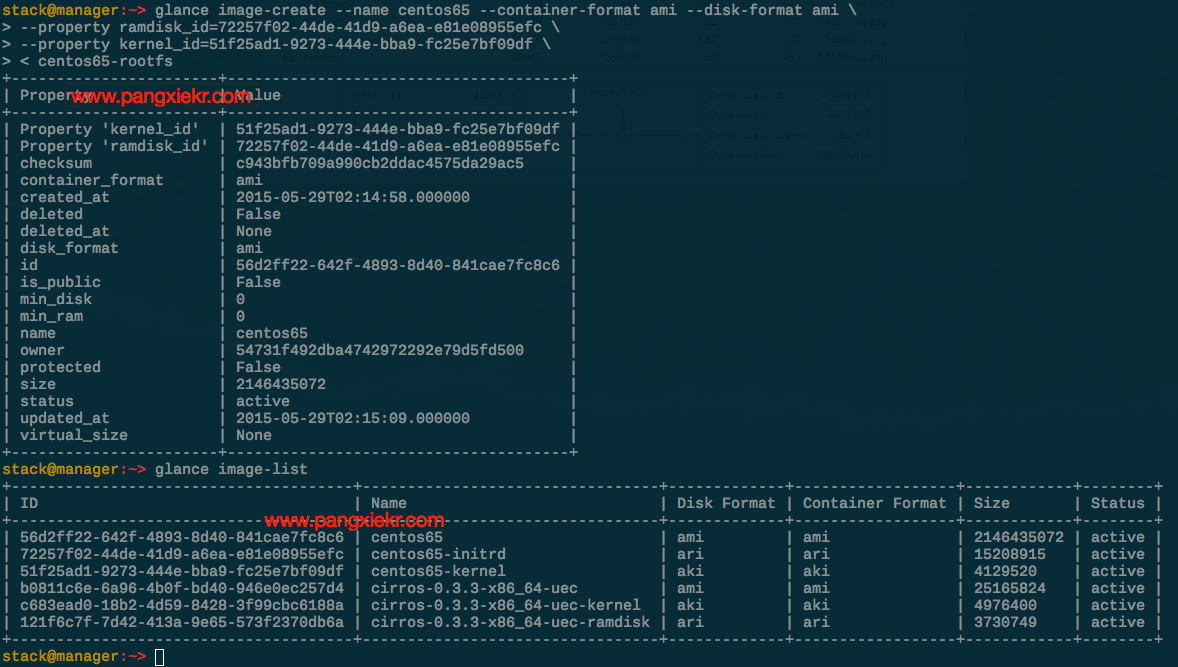
至此,我们的AMI镜像就已经制作完毕并上传到Glance了。
启动instance测试镜像
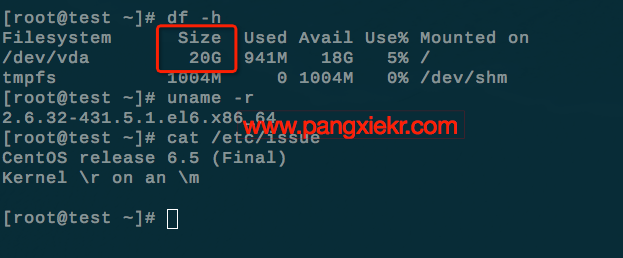
选择我们刚制作好的镜像,注意看这里Flavor(openstack 的Flaor等同于AWS里的instance type)根分区是20G。一会儿instance启动完了,我们看下是不是
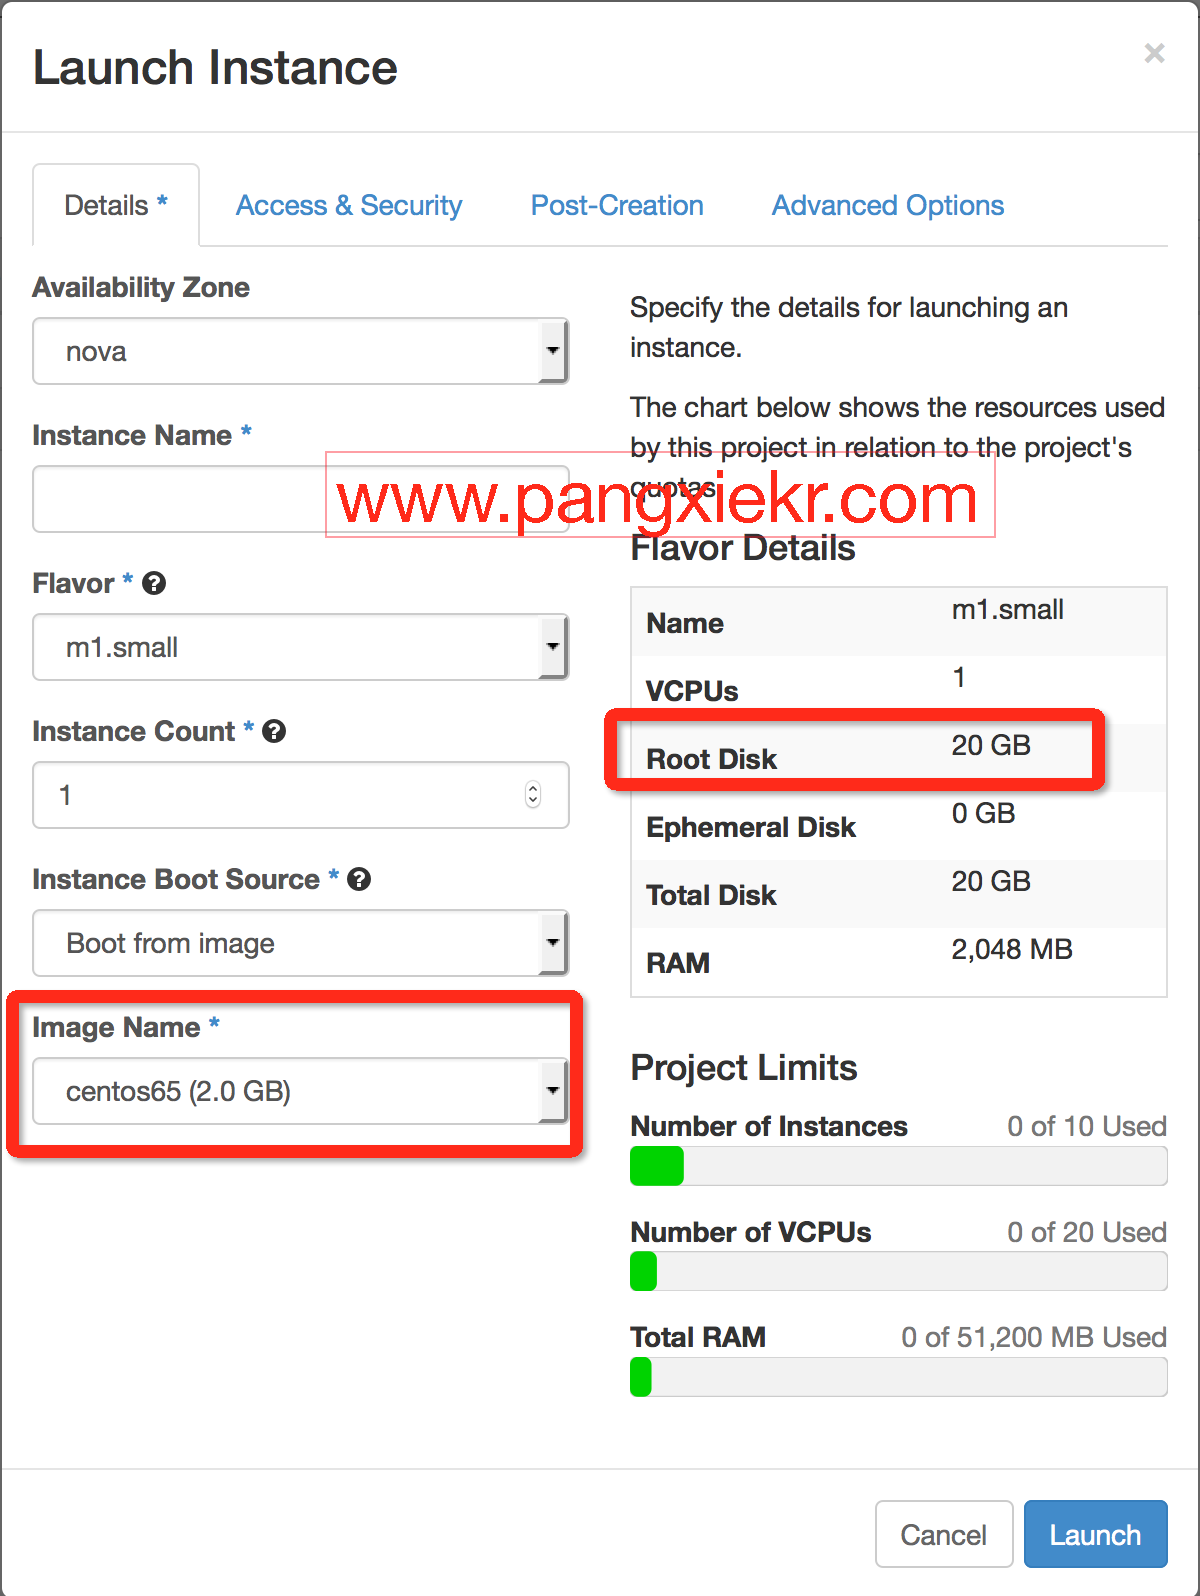
已经起来了
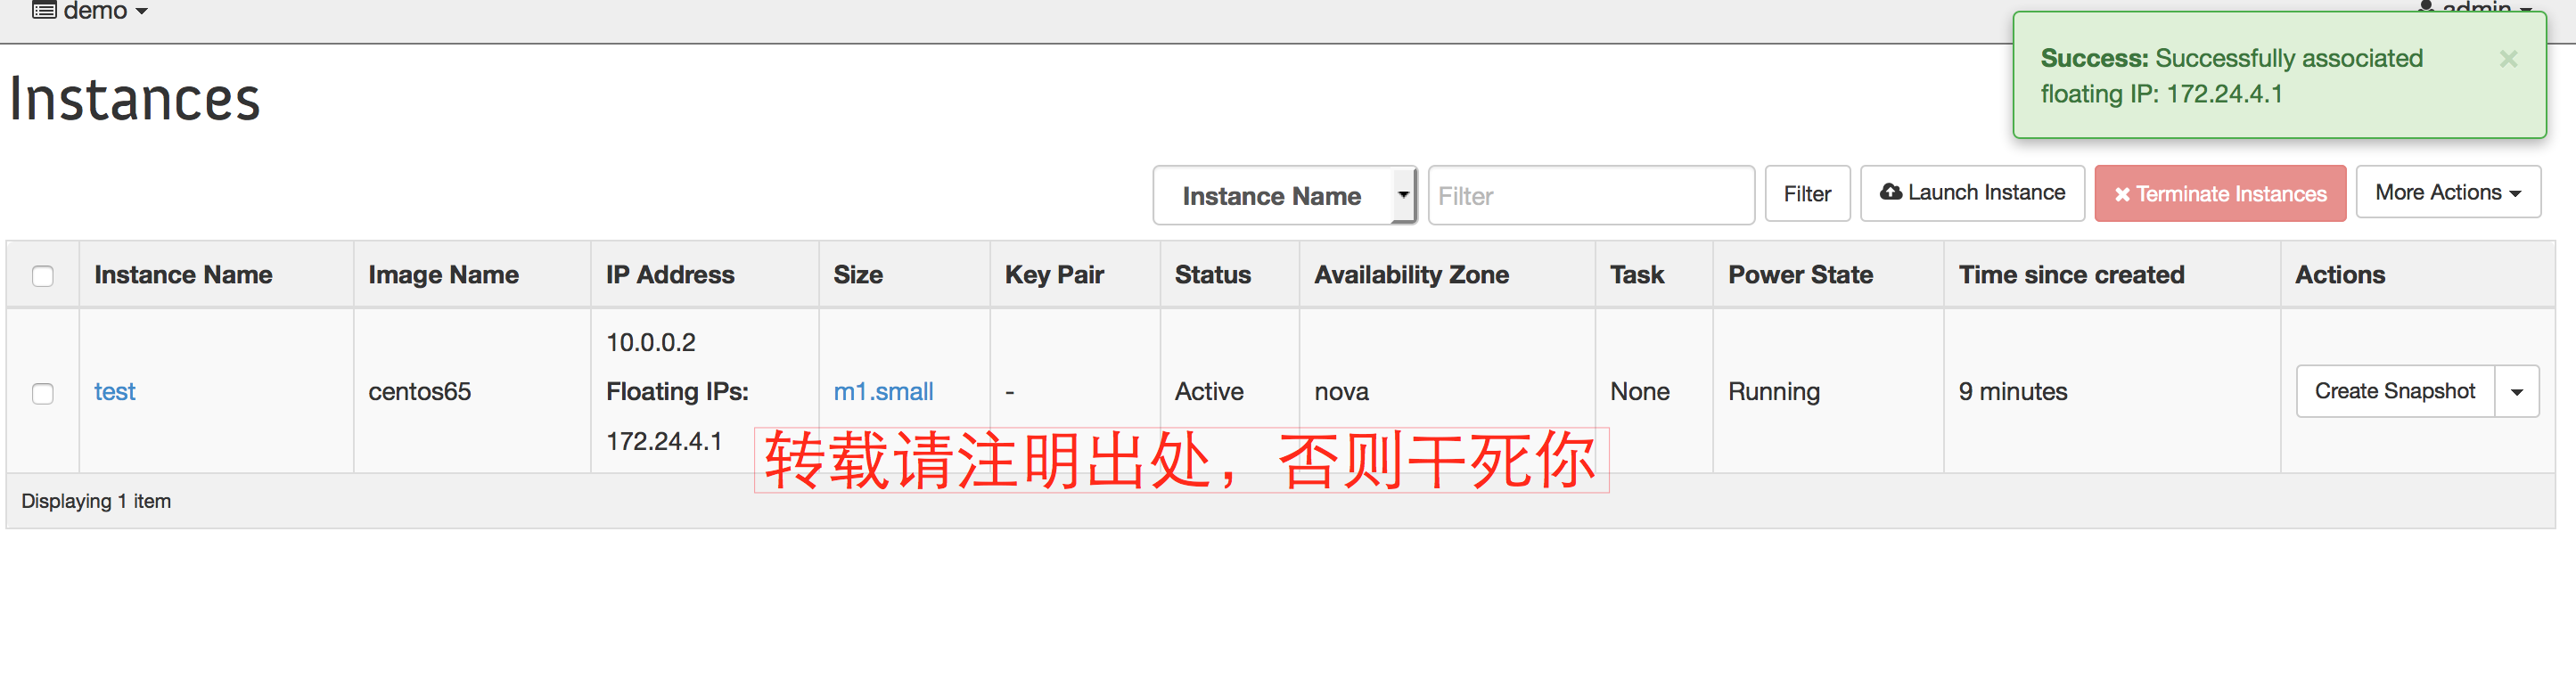

登录instance可以看到root device 已经是20G了。
PS: 以上测试都是在我本机完成,你用在生产肯定也不会有什么问题。后续再找时间写一篇如果一键式在本机部署openstack测试环境。这里再吐槽一下devstack 太尼玛不稳定了,搞死人。